Grab your copy of the Total Eclipse Heart Block and check out this free zip pouch tutorial to turn it into a quick and easy zippered pouch for some serious cuteness!
Supplies
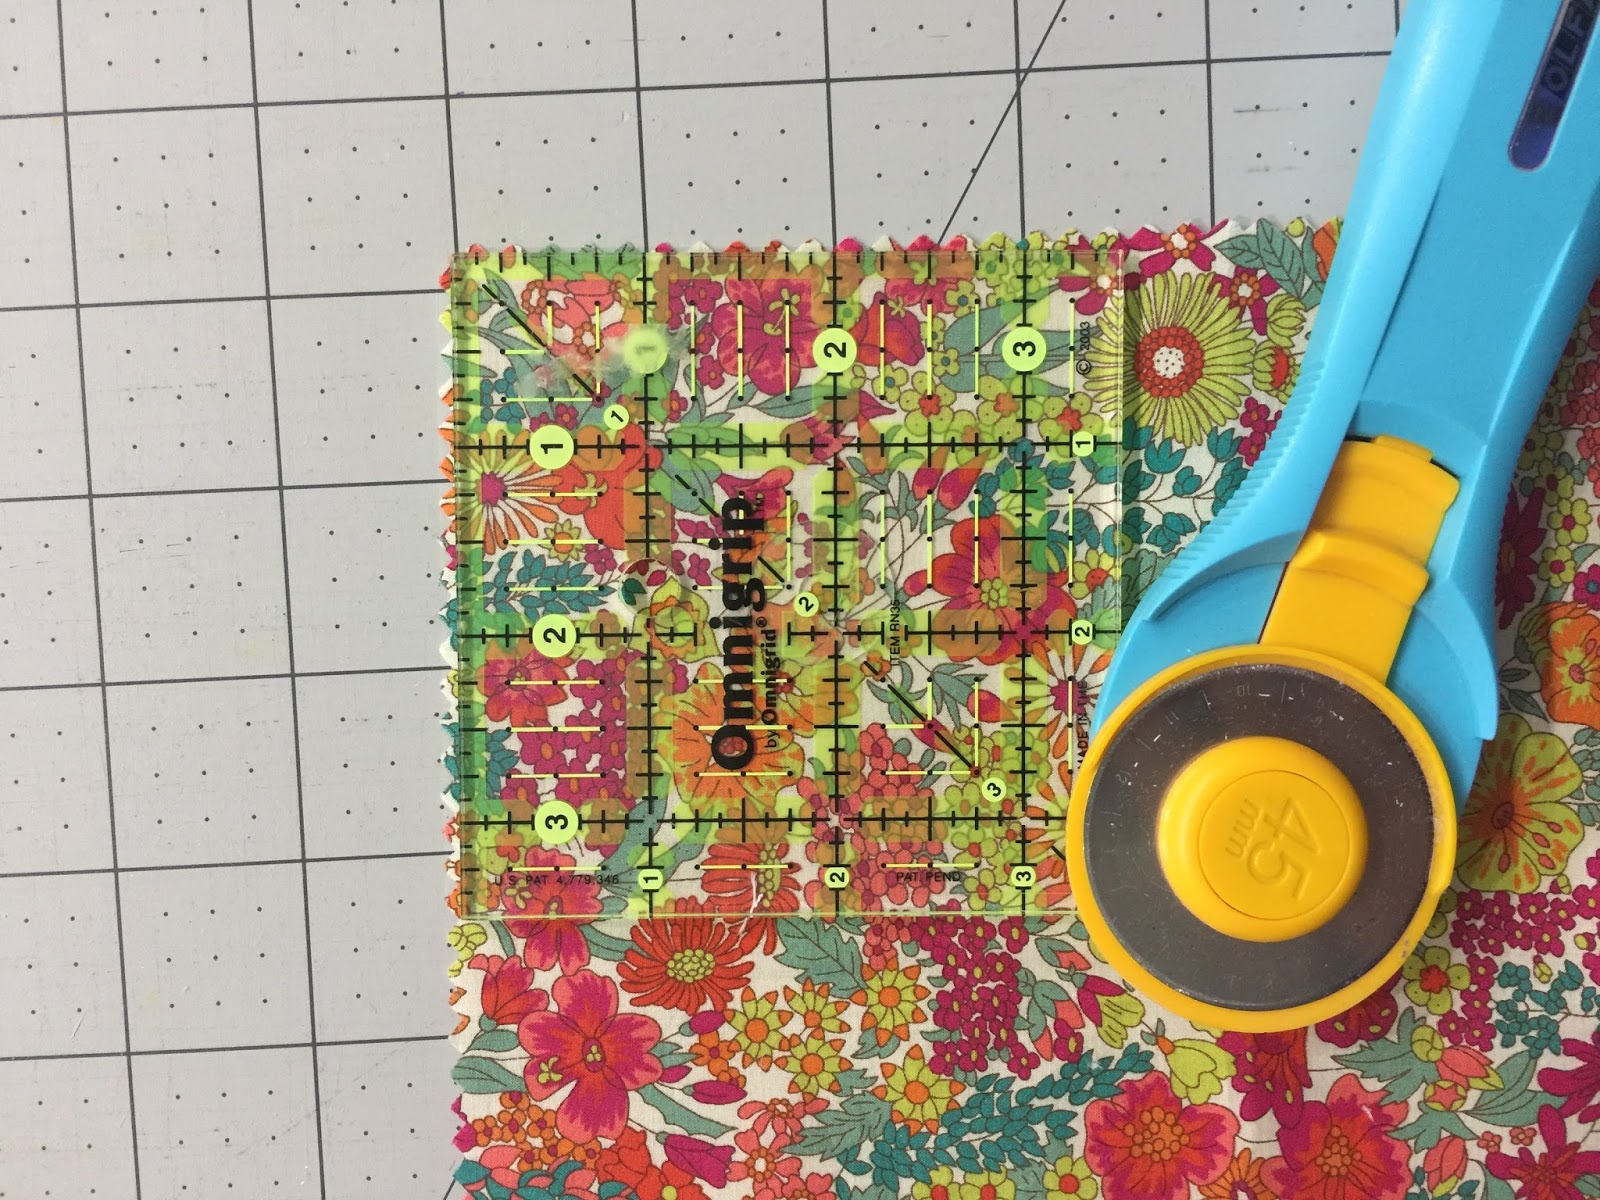
- Supplies/fabrics listed in the Total Eclipse Heart Block pattern – we’ll be making the 7″ x 12″ block.
- Additional fabric cuts:
- (2) 1.5″ x 4″ zipper ends cut from exterior fabric
- (2) 7.5″ x 12.5″ lining for zip pouch
- (2) 7.5″ x 12.5″ pieces of SF101 fusible interfacing for the lining
- (1) 7.5″ x 12.5″ for Exterior back of pouch (cut this at 8.5″ x 13.5″ if you plan to quilt it, then trim down to 7.5″ x 12.5″. You may also want to alter your border pieces on the Total Eclipse Heart Block and cut them at (2″ x 5.5″ and 2″ x 13.5″) if you’re quilting the front exterior or the quilt block.)
- If quilting, you’ll also need (2) 10″ x 15″ batting pieces.
- If not quilting, cut (2) 7.5″ x 12.5″ pieces of SF101 fusible interfacing for the exterior.
- 14″ closed end nylon zipper
- Erasable marking tool (I like to use Frixion pens)
- Turning tool or chopstick
Instructions
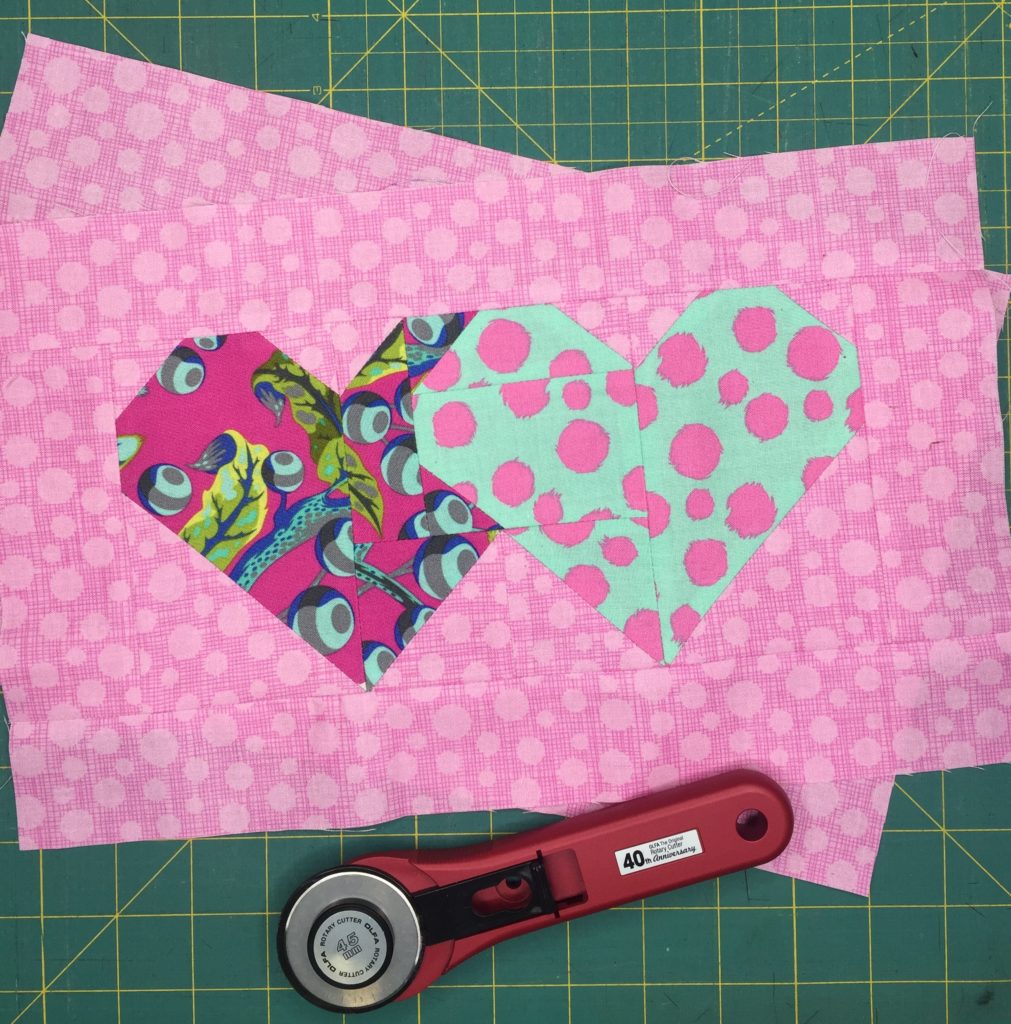
- To begin, follow the instructions in the Total Eclipse Heart Block pattern to make the 7″ x 12″ block. You’ll need to decide if you want to quilt your zipper pouch or not.
- If quilting – cut the border pieces at (2) 2″ x 5.5″ and (2) 2″ x 13.5″, instead of the 1.5″ width to give a little extra room for shrinkage. Then sew the pieces on as directed.
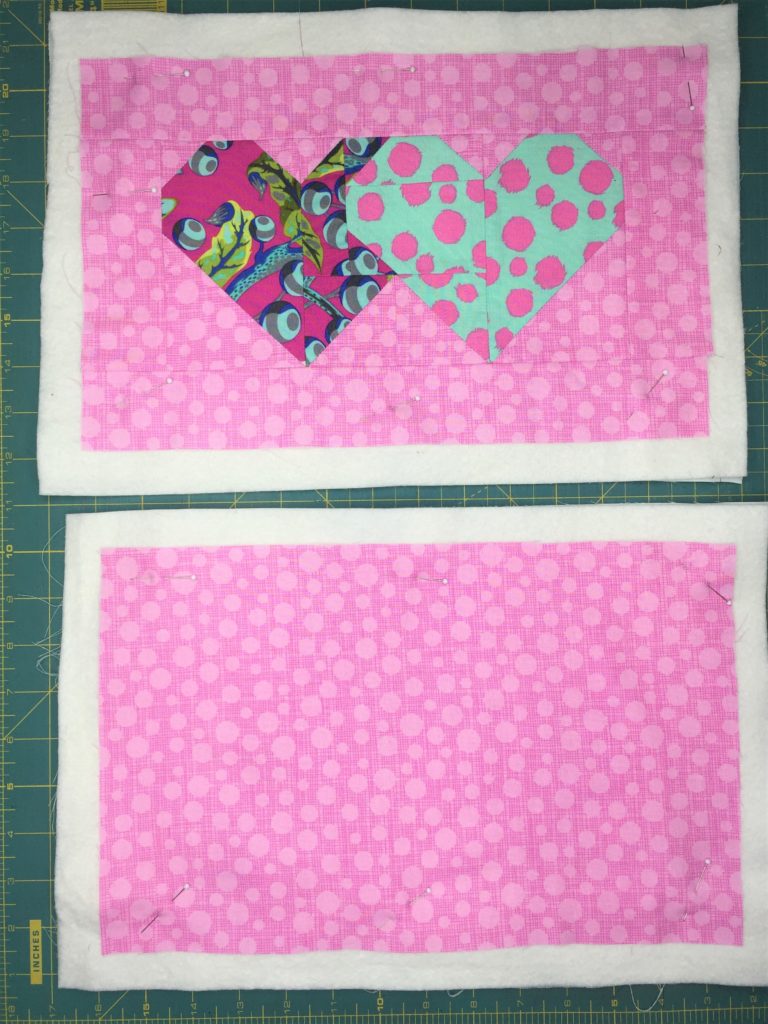
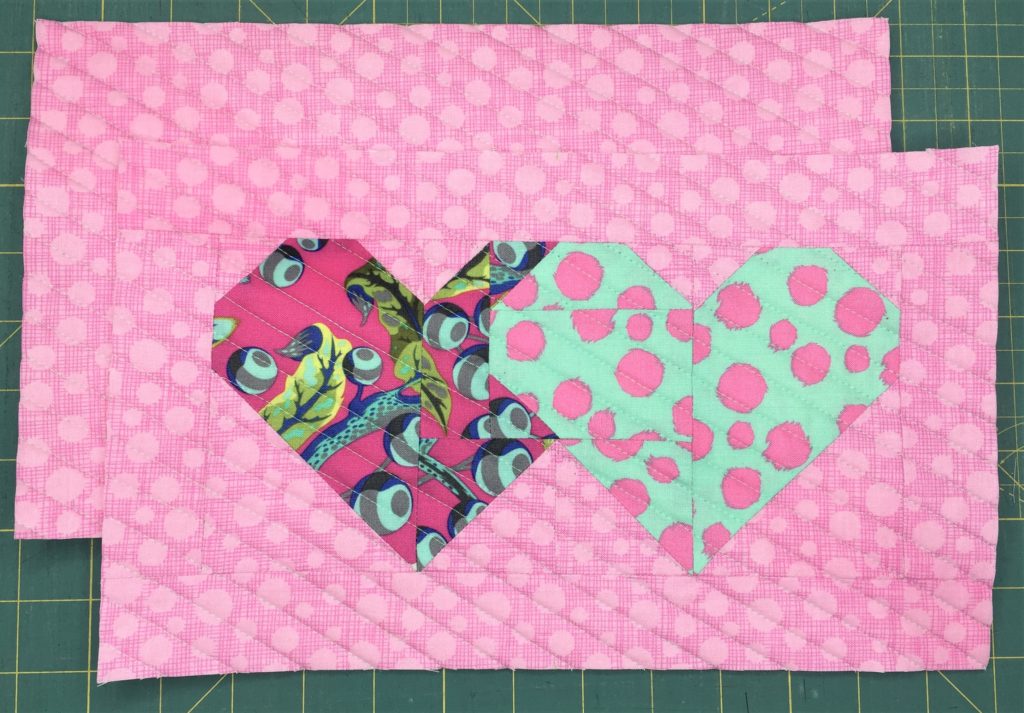
- Make a quilt sandwich, using 2 pieces of scrap fabric (these won’t be seen in the finished pouch) measuring 10″ x 15″ as the back of your quilt sandwich. Place the scrap piece wrong side up, place the batting piece on top of that, then center the 8.5″ x 13.5″ block on top of that and baste the layers together using your favorite method. Make another quilt sandwich with the 8.5″ x 13.5″ Exterior back piece. Quilt as desired, then square up the quilted pieces to measure 7.5″ x 12.5″.
- If not quilting – Follow the cutting/sewing instructions to make the block, then apply the fusible interfacing to the wrong side of the 7.5″ x 12.5″ quilt block, following the manufacturer’s instructions. Do the same for the 7.5″ x 12.5″ Exterior back of pouch.
- Apply the fusible interfacing to the wrong side of each lining piece.
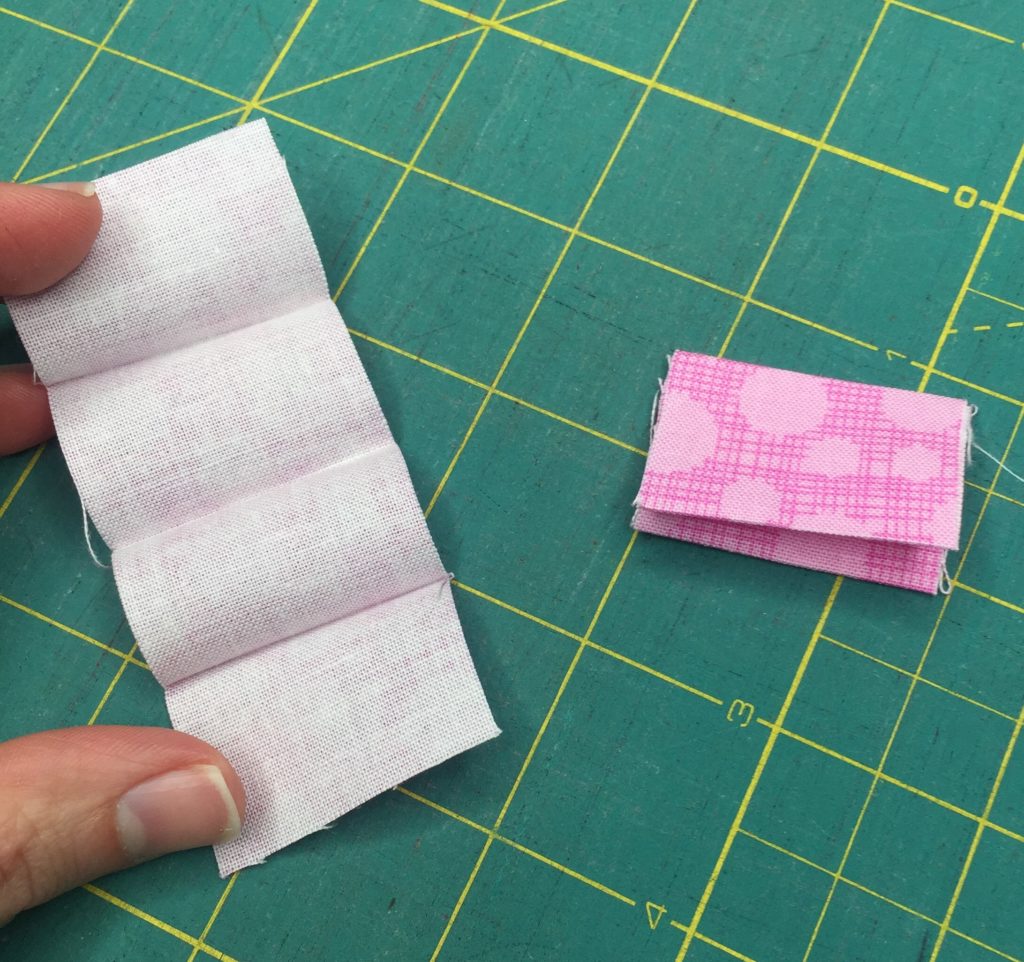
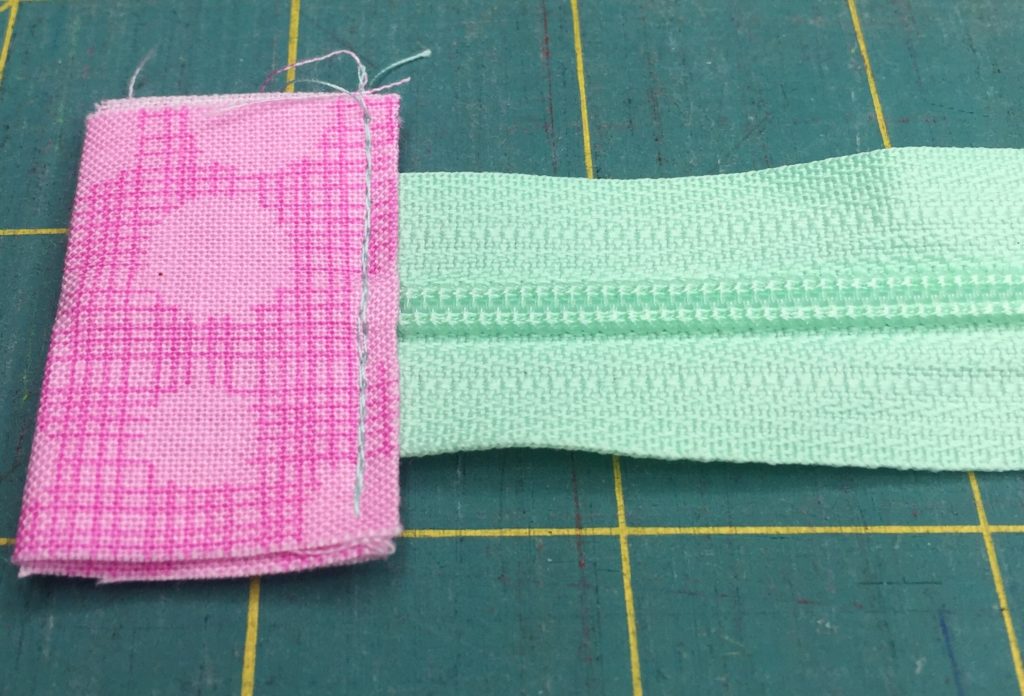
- Take the 1.5″ x 4″ zipper end pieces and fold the 1.5″ ends to meet in the center. Press. Fold them in once more to conceal all raw edges and press.
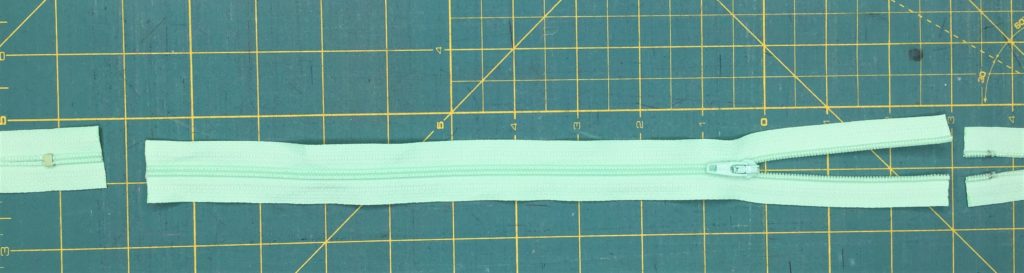
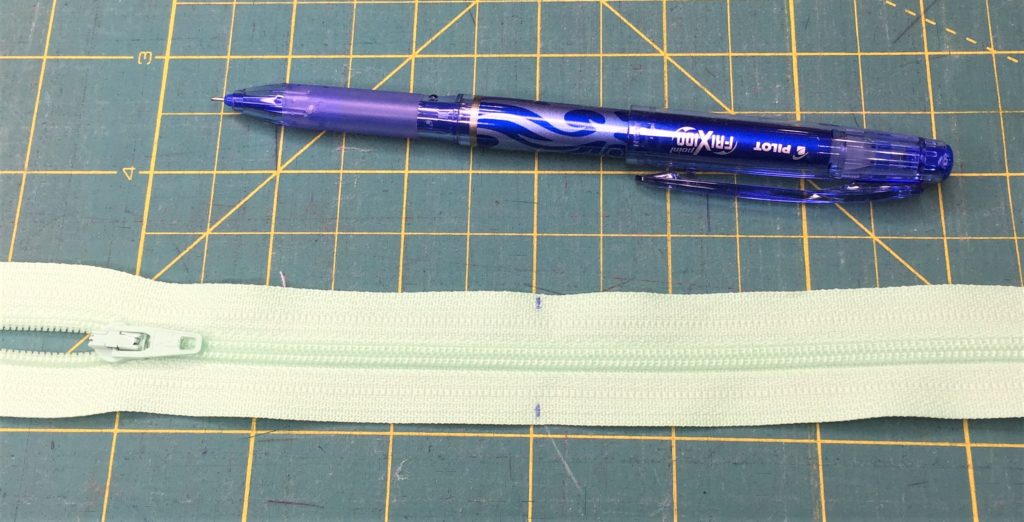
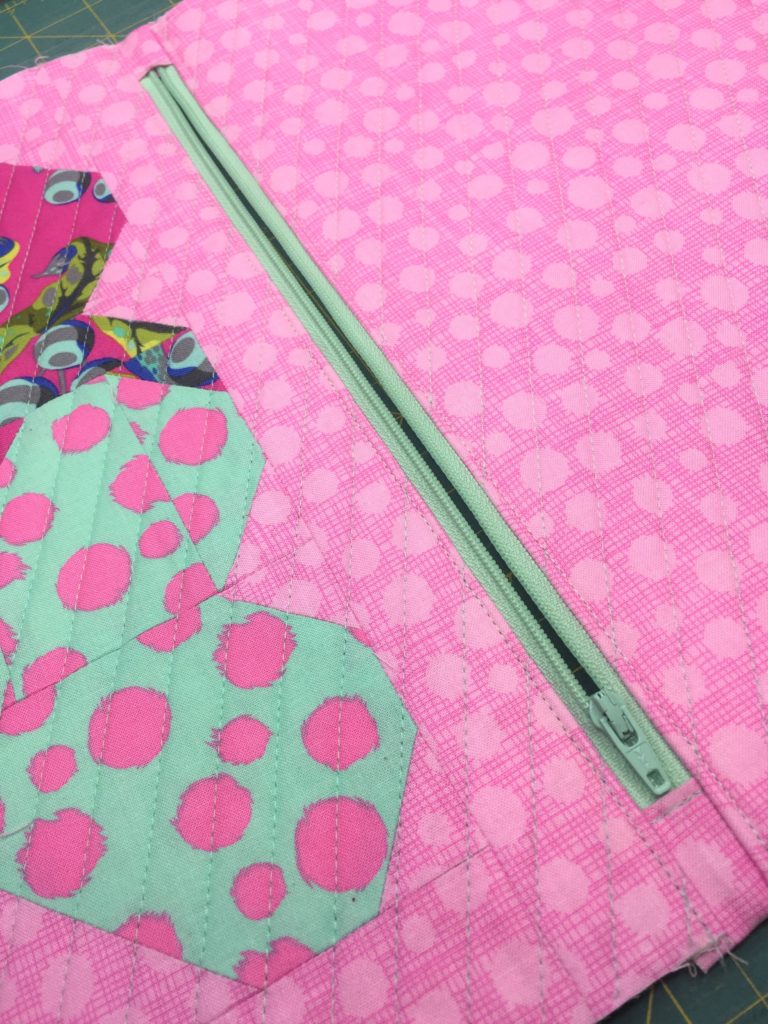
- Take the 14″ zipper and move the zipper pull in away from the metal teeth a little. Trim your zipper down to measure exactly 12.5″, and make sure you trim the metal bits off when you trim it down. Be very careful to not pull your zipper head off.
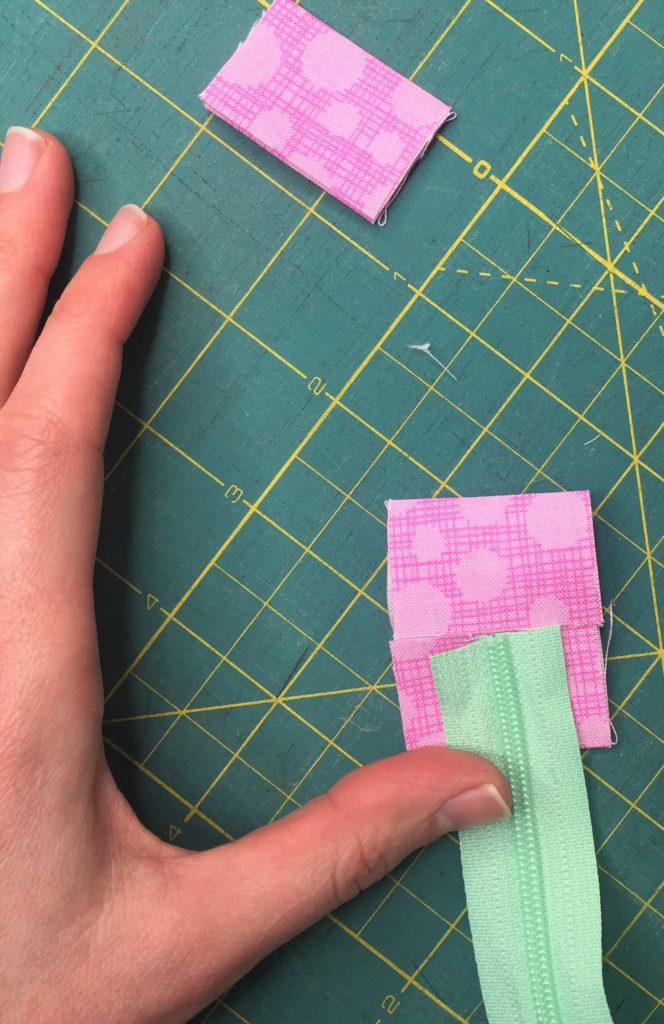
- Take the zipper end pieces and place one end of the zipper butted into the middle of the folded piece. Use clips or pin in place. Repeat for the other end of the zipper. Take to your sewing machine and topstitch 1/8″ from the folded edge to contain the zipper. Trim away the edges of the zipper pieces so they’re even with the zipper tape.
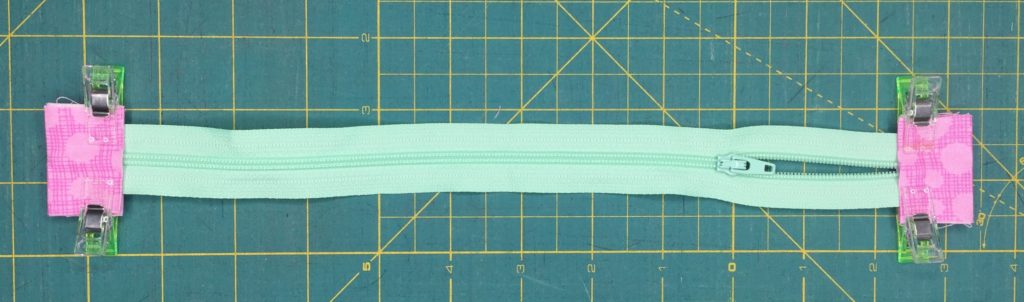
- Measure and mark the center top 12.5″ edges of all 4 of your fabric pieces. Measure and mark the center of the zipper.
Assembling the Zipper pouch
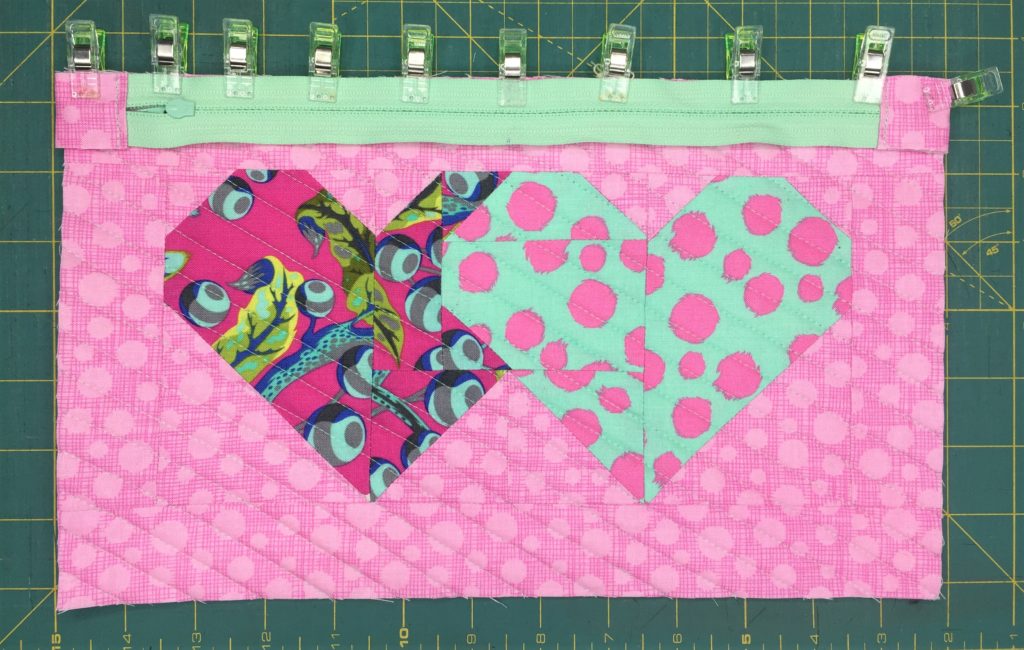
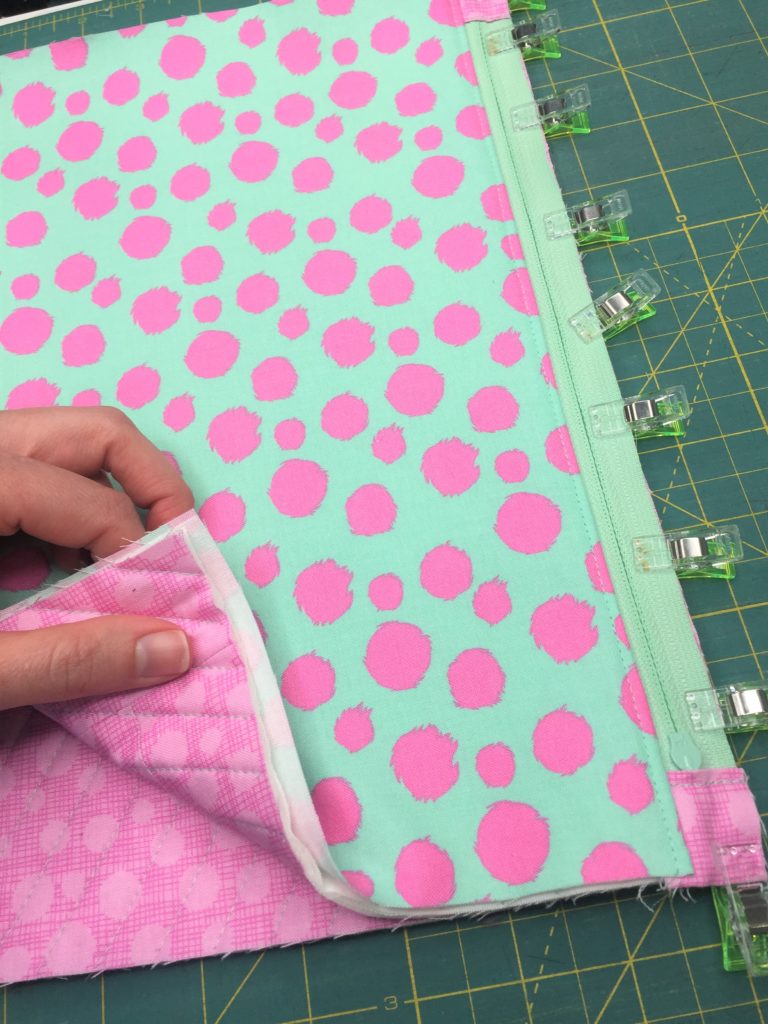
- Take the assembled quilt block (quilted or not) and place it right side up. Take the zipper and place it right side down, lining up the centers and the edge of the zipper tape to the top edge of the block. Use clips or pin to secure. Place one lining piece right side down on top of the zipper, sandwiching the zipper between the two layers and matching the centers again. Clip or pin in place. Use a zipper foot to sew through all three layers with a 1/4″ seam allowance. Press the fabrics wrong sides together away from the zipper and topstitch 1/8″ from the folded edge of the fabric.
Place zipper RSD on block 
Place lining RSD on zipper 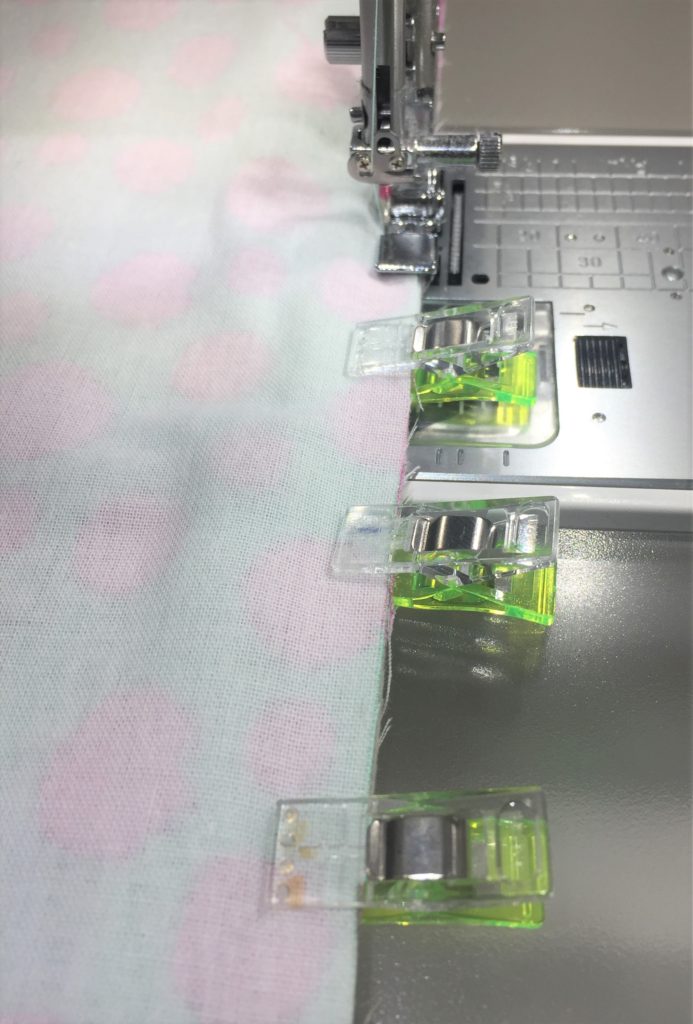
Use a zipper foot to sew through all three layers 
Press the lining and block wrong sides together, away from the zipper and topstitch.
- Take the exterior 7.5″ x 12.5″ piece (quilted or not) and place it
right side up. Take the zipper (now attached to the quilt block) and place it right side down, lining up the centers and the edge of the zipper tape to the top edge of the block. Use clips or pin to secure. Place the remaining lining piece right side down on top of the zipper, sandwiching the zipper between the two layers and matching the centers again. Clip or pin in place. Use a zipper foot to sew through all three layers with a 1/4″ seam allowance. Press the fabrics wrong sides together away from the zipper and topstitch 1/8″ from the folded edge of the fabric.
Exterior back RSU, zipper right side down 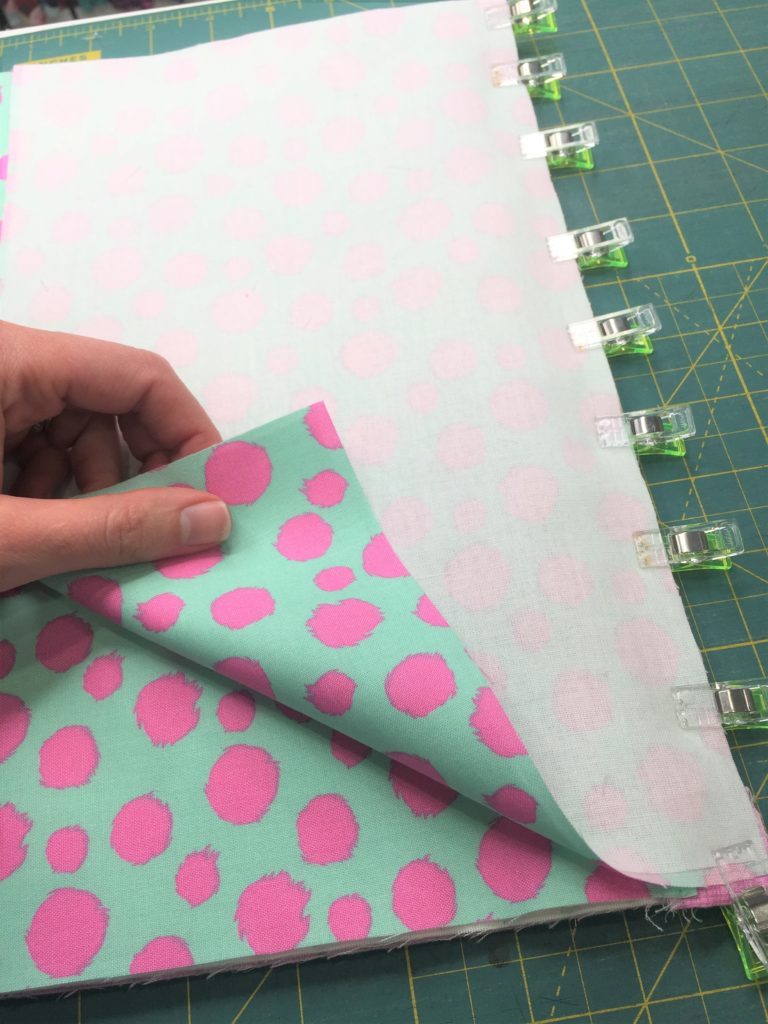
Remaining lining piece, right side down 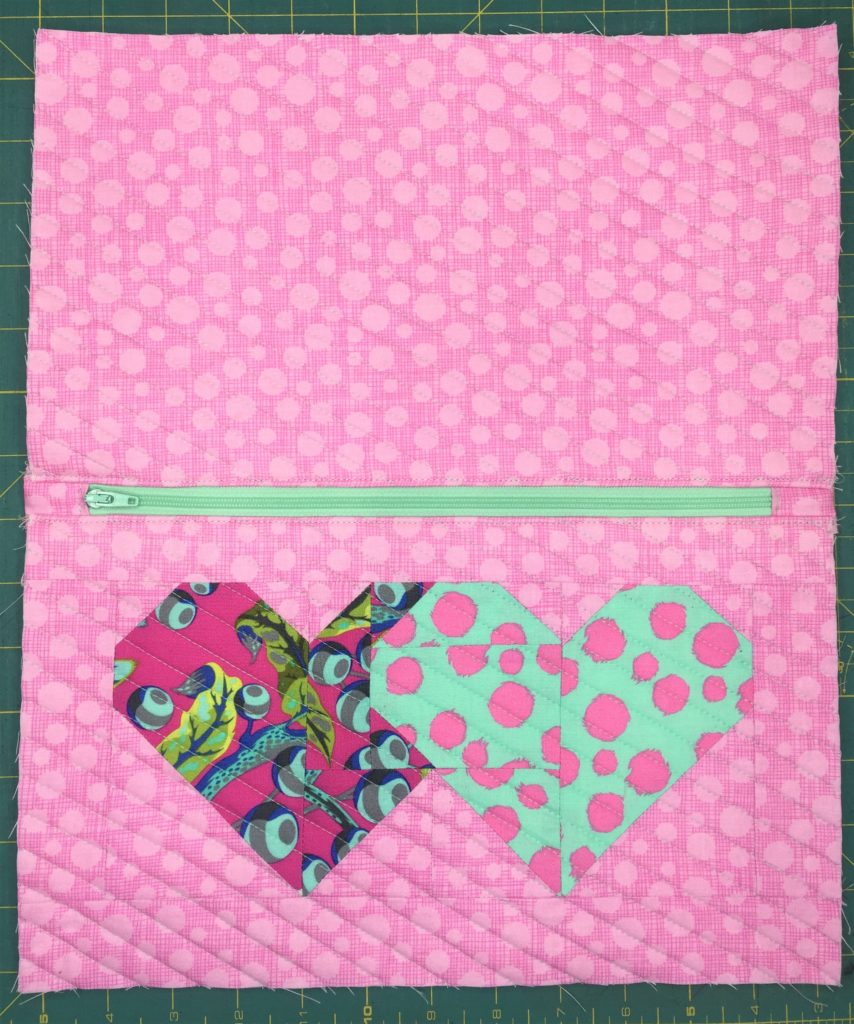
Press fabrics away from the zipper and topstitch
- Open the zipper. Pull the exteriors and linings apart from eachother and pin the edges of the exterior RST. Do the same with the lining pieces. Pin or clip in place. Mark a 5″ opening centered on the bottom of the lining. This will be left open for turning. Start sewing with your regular pressing foot, and sew all the way around the zip pouch, leaving the opening unsewn.
Open the zipper 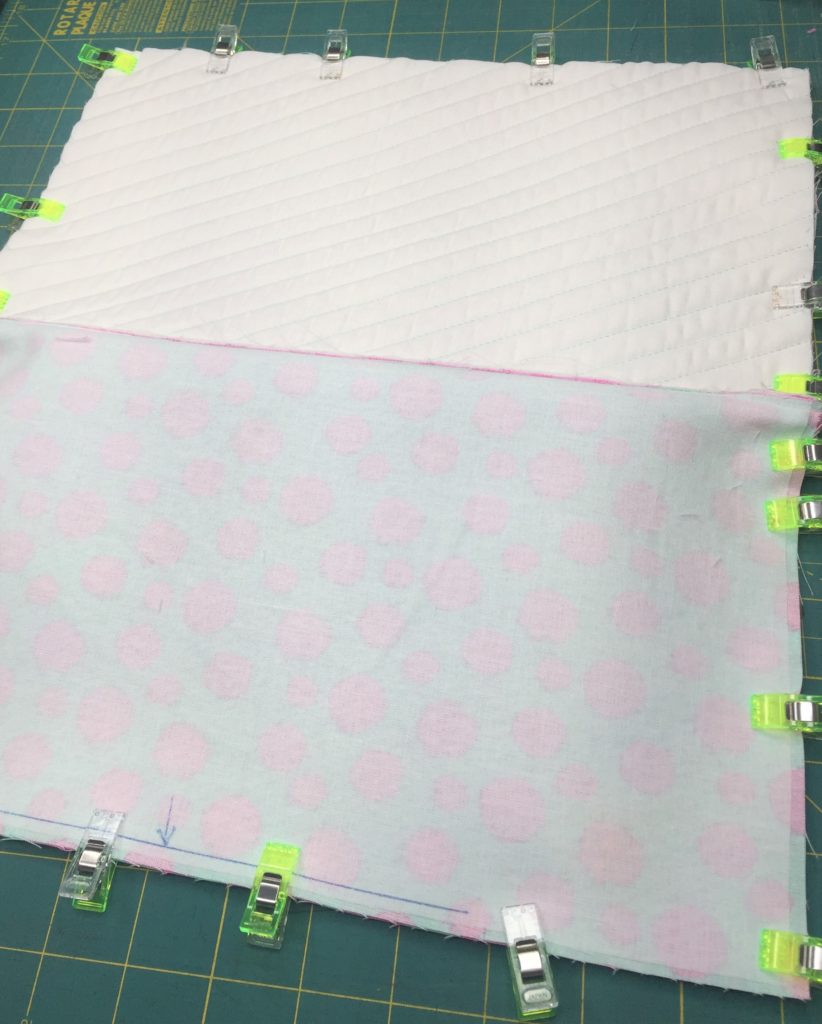
Place Exteriors RST and linings RST, and clip/pin. Leave a 5″ opening along the bottom of the lining pieces.
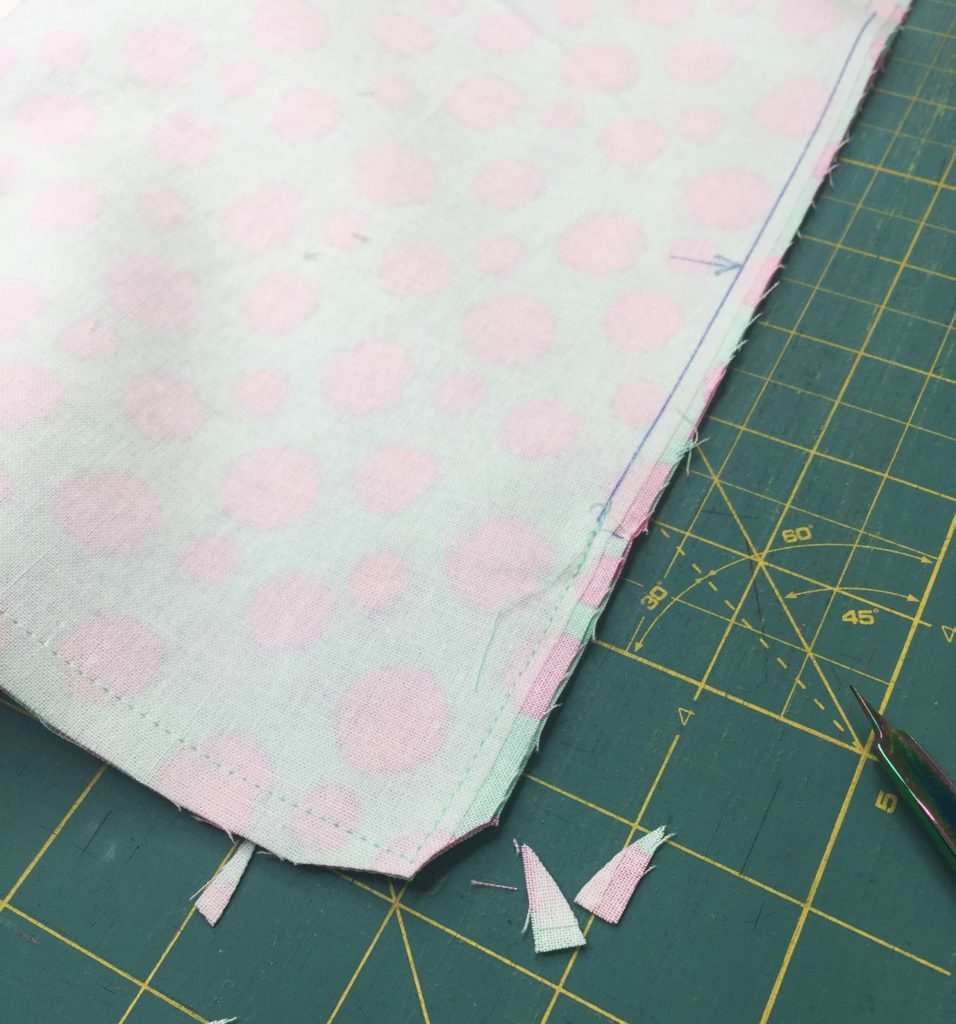
- Trim the corners away being careful not to clip the stitches. Turn the bag right side out through the opening in the lining and push the corners out with a chopstick or turning tool.
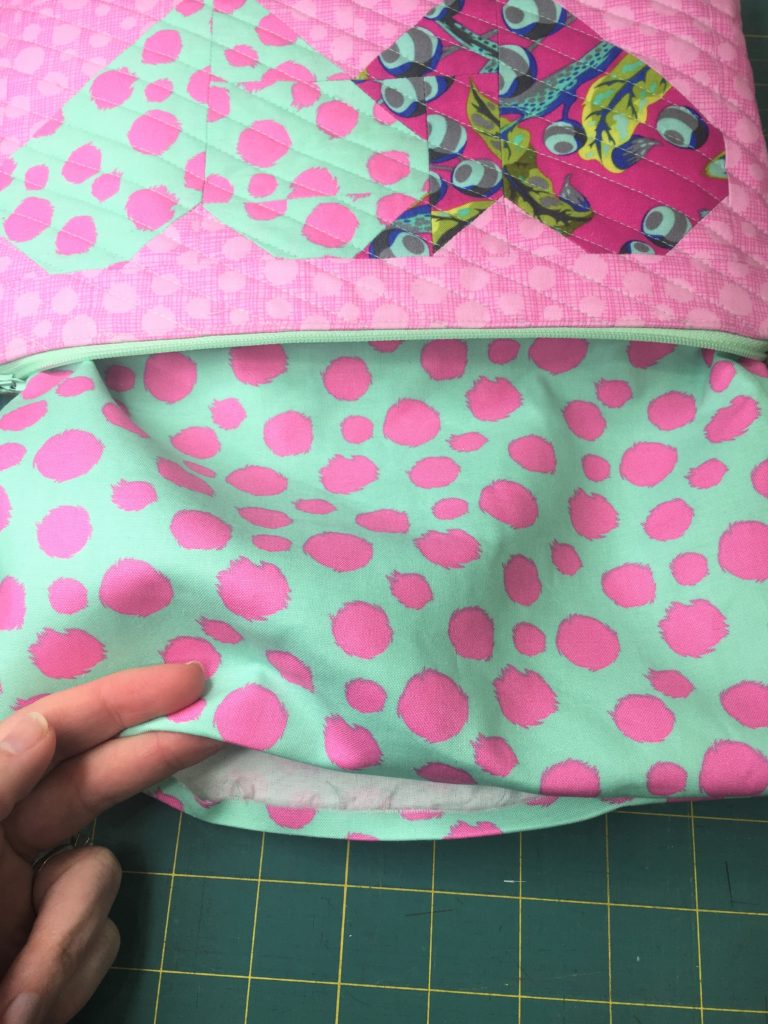
- Fold the raw edges of the opening in by 1/4″ and press. Clip the folded edges together and topstitch or whipstitch closed to close the opening. Push the lining down into the bag and you’re done! Fill that cute little zip pouch up with some goodies and it’s ready to be gifted.
Raw edges of lining folded inward 1/4″ 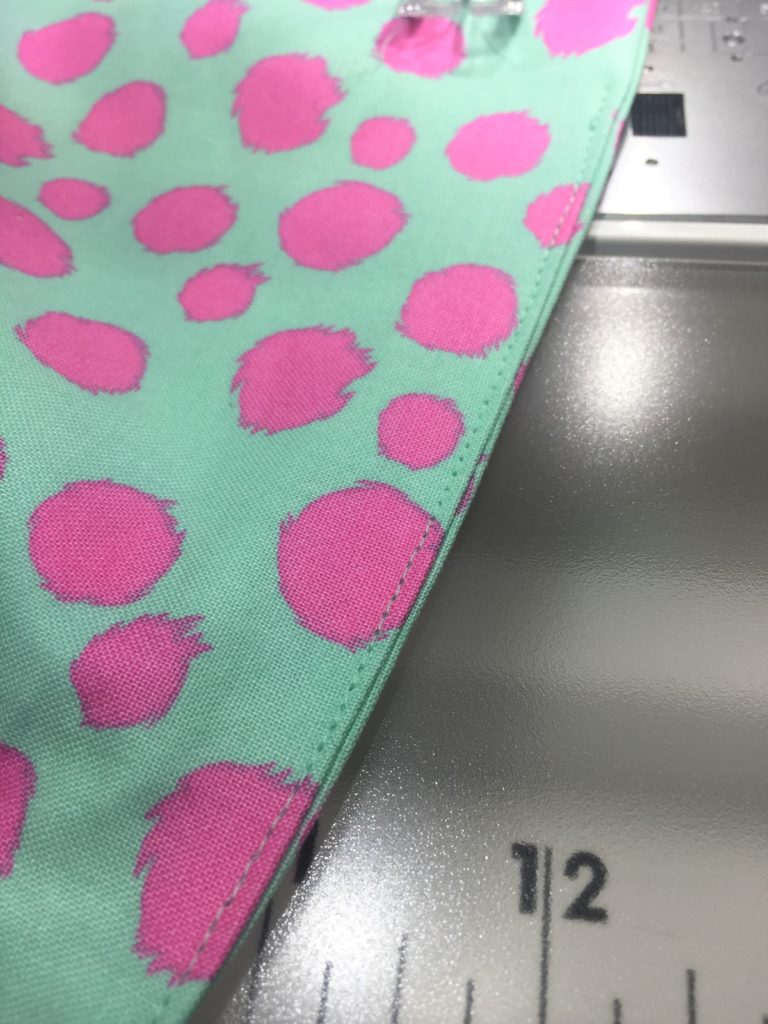
Opening in lining – topstitched closed 
Lining pushed in