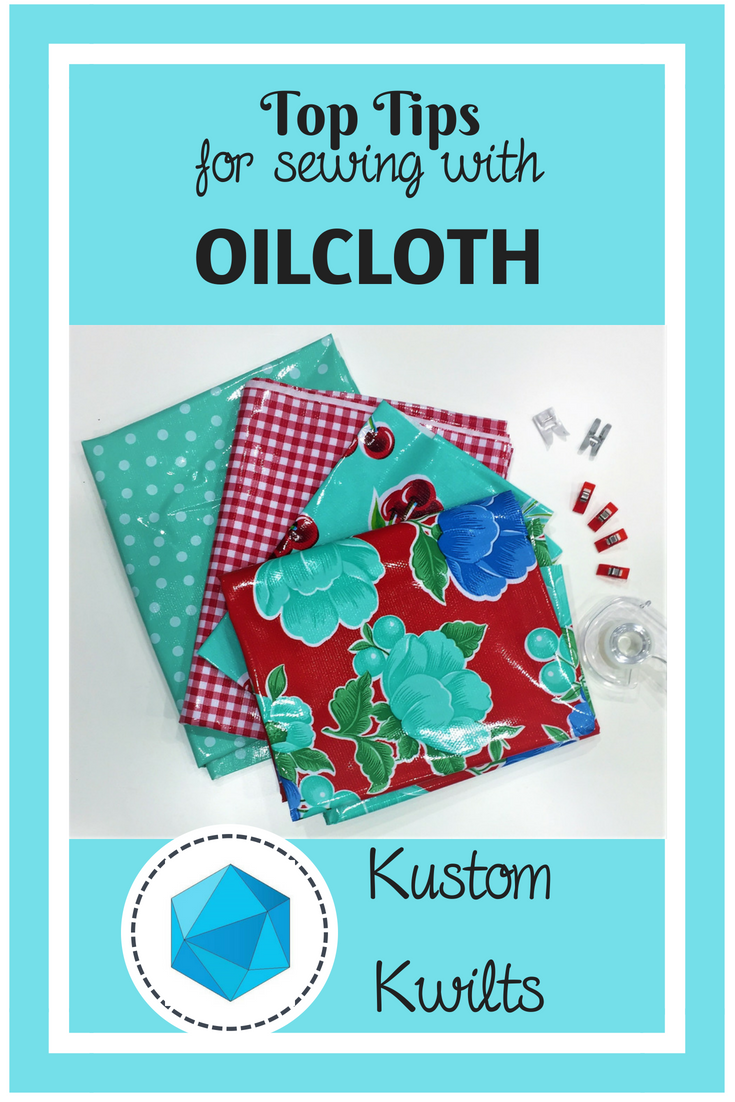
So I know what you’re thinking…this blog is called “Kustom Kwilts”…what gives with the oilcloth?
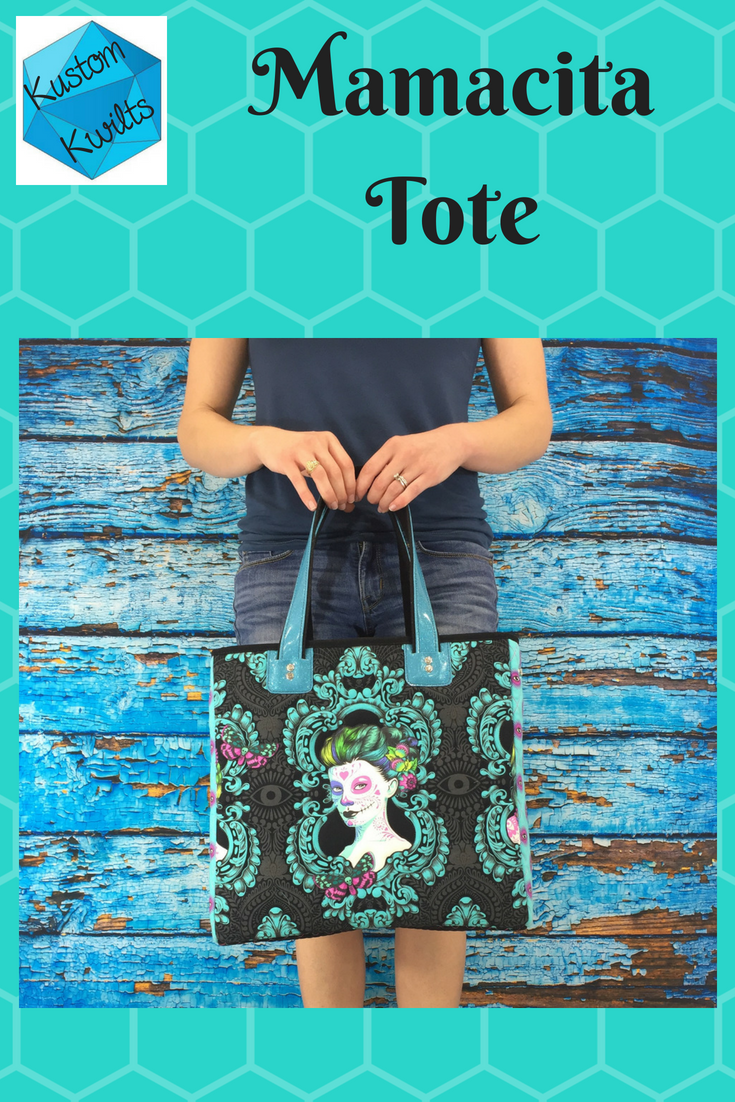
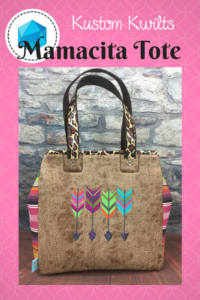
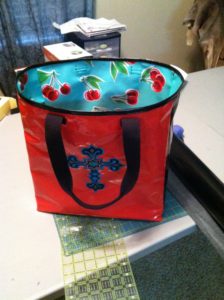
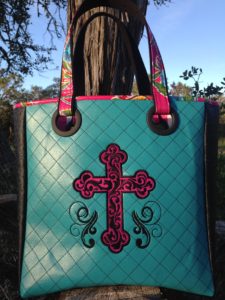
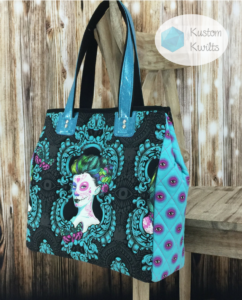
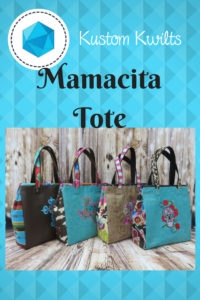
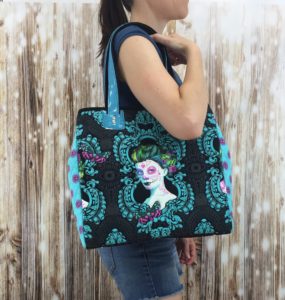
There are so many skills in sewing and quilting that can be transferred to other things-garments, bags, household and decor items. If you can sew a straight line, there are so many other amazing things you could be creating if you’re willing to do a little exploring. I just released my new Mamacita Tote pattern, which is a perfect fit for using quilting cotton AND alternative fabrics! The pattern suggests using oilcloth for the lining, and I don’t want to leave you hanging on how to do that (you can also use quilting cotton). I love to quilt, but I also adore sewing clothing and bags. I hope I can share some of that love with you!
What do I mean by alternative fabrics?? I’m talking about vinyl, leather, faux leather, and one of my personal favorites, OILCLOTH. I’d love it if you were willing to read on and open yourself up to some great new possibilities for yourself!
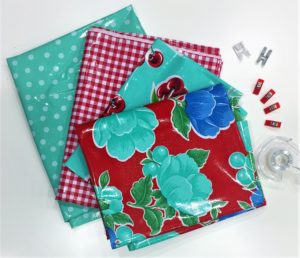
Let me break it down for you: A lot of the things you need to know about oilcloth also goes for other vinyl fabrics and faux leathers. Here are some things you need to know before buying your first yard of oilcloth–
- It’s water resistant/doesn’t absorb water.
- It’s relatively inexpensive.
- It is super-duper easy to clean. All you need is a wet paper towel and you can wipe off pretty much anything.
- It doesn’t fray.
- It’s more stable than quilting cotton, so most of the time it doesn’t need extra interfacing when used in bags.
- When you use it as a purse lining, it wipes clean and is SO easy to maintain!
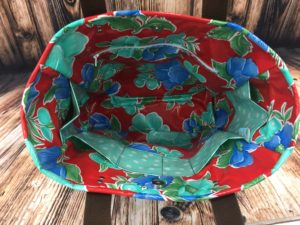
Mamacita Tote with an Oilcloth lining
I’m sure I’m leaving a few important things out, but these things alone are pretty fantastic. There are some things you’ll want to know about sewing with oilcloth and what you want to do a little differently than if you were sewing with regular quilting cotton.
Here are my Top Tips for sewing with OILCLOTH~
- Don’t ever use an iron to get the wrinkles out! You will melt the fabric, and more than likely ruin your iron. I like to either use a blow dryer on low heat to relax wrinkles , or lay the fabric out in the sun on a flat surface for a few hours (I live in Texas, so sometimes it doesn’t take long!)
- The holes your needle makes in the fabric are permanent. That means you want to use a longer stitch length (somewhere around 3.5) so you have less perforations in the fabric. If you’re using a teeny tiny stitch length, your needle is making a ton of holes that’s making your fabric weaker.
- Don’t use sewing pins! The holes they make will be permanent. When securing oilcloth, use clips instead of pins.
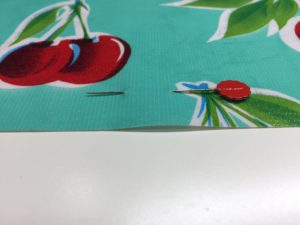
Pins and oilcloth are a big No-No! Don’t do it! - Use a Teflon or non-stick sewing foot to help the oilcloth slide under your foot with ease. If you don’t have a Teflon foot, you can also stick a piece of satin scotch tape under your sewing foot, and that will help ease the fabric instead of sticking to it. You can also use tissue paper between the presser foot and the oilcloth, then tear it away when you’re done.
- Since oilcloth is a little thicker than cotton, try using a slightly larger needle, like one suited for leather or denim. If you try a smaller needle and it works okay for you, stick with it–because that means the holes the needle makes will be smaller :).
I buy all of my oilcloth at Jack’s Country Store (not an affiliate link). It seems like an unlikely place to get it, but it’s a pretty fun site, and they have tons of options and cheap shipping. Are you ready to try it? Go ahead, be brave! I have a total oilcloth addiction now, and it’s so easy to work with. I’d love it if you gave it a go and shared with me how you used oilcloth in your next sewing project! Happy sewing 🙂