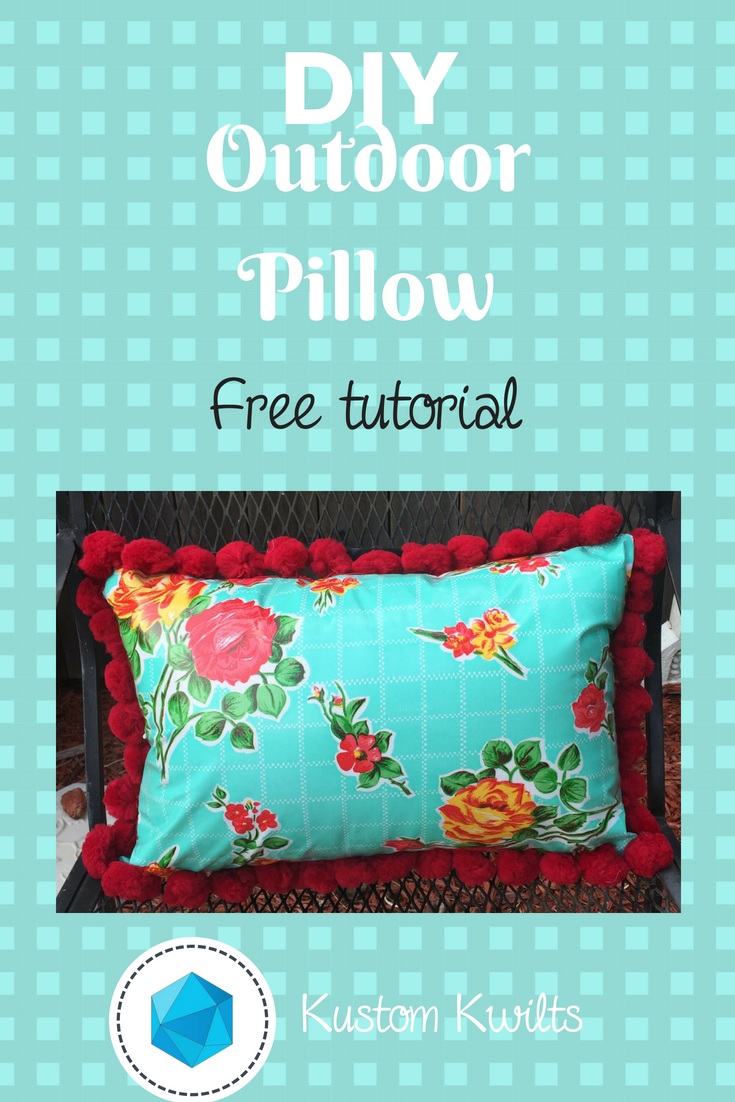
DIY Outdoor Pillow tutorial
Are you looking for a way to brighten up your patio with some fun home dec pillows? Make your own DIY outdoor pillow with this quick and easy tutorial to create a super cute oilcloth pillow with pom pom trim, and give your deck a cheery look! I used my Janome Horizon Memory Craft 9400QCP and the Janome Ultra Glide Needle Plate and Ultra Glide Foot to stitch up this oilcloth pillow. Start sewing with some new fabrics and try out a new foot attachment that will take your sewing projects to the next level. The Ultra Glide Needle Plate and Ultra Glide Foot set is perfect for working with fabrics that might not smoothly feed under the standard foot A, such as oilcloth and laminated cotton. Also, check out my previous post on TOP TIPS FOR SEWING WITH OILCLOTH. This is a great tutorial for beginners, and will take approximately 4 hours from start to finish. The finished pillow size is 12″ x 18″.
Supplies: Sewing machine, Janome Ultra-Glide foot and Ultra Glide Needle Plate (Teflon foot for all other sewing machine brands), Zipper foot (Foot E for Janome), Needle, Pre-wound bobbin.
Fabric/notions required:
- Circle Template printed at 100% and cut out
- 1 yard Aqua Rose gall oilcloth (Fabric A) sub cut into:
- (2) 6-3/4” x 19” (zippered back of pillow)
- (1) 13” x 19” (front of pillow)
- 3 yds. Jumbo Pom Pom Trim/ball fringe
- 40 wt. Black sewing thread (or white for less contrast)
- 20” zipper
- 12” x 18” Weather proof pillow form/Outdoor pillow form
- Marking pen
- Rotary cutter/ruler/mat
- Binding clips
- Scissors

Prepare the back of the pillow and install the zipper
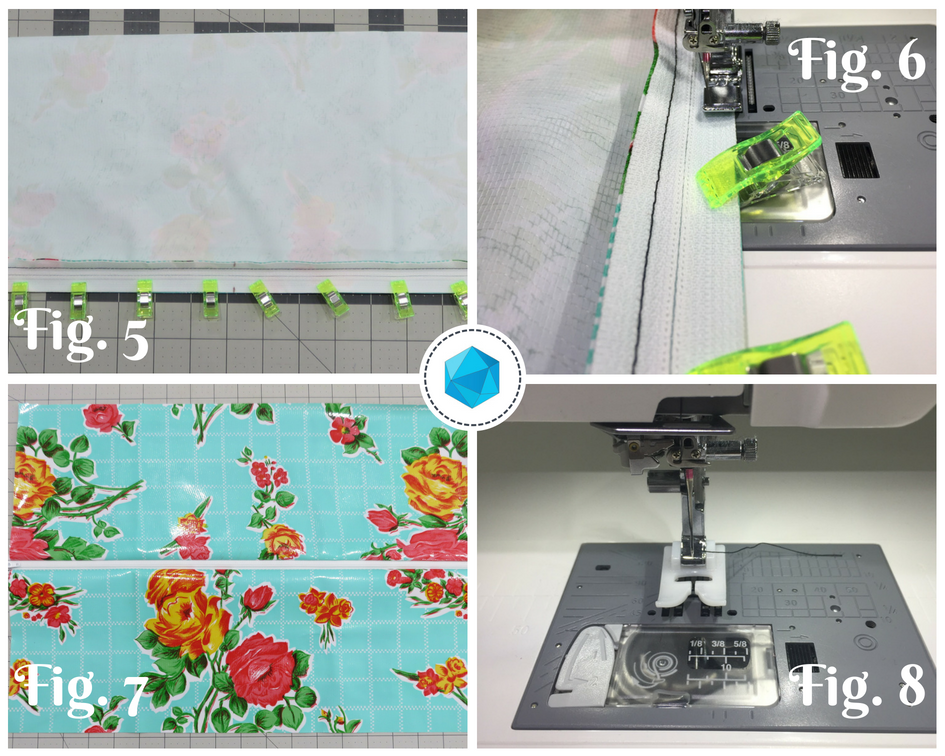
- Take the two 6-3/4” x 19” pieces of Fabric A and measure and mark the center of one 19” edge. Take the 20” zipper and measure and mark the center on both edges of the zipper tape (see figure 1).
Tip: Use binding clips instead of pins when working with oilcloth. The fabric does not heal when holes are made in the oilcloth. Any holes made in the oilcloth will be permanent. Also, use a slightly longer stitch length to minimize the amount of puncture holes made in the fabric when sewing. Typically, adjusting the stitch length from the standard 2.4 to 3.0 is a good adjustment. The raw edges of oilcloth don’t fray, so there isn’t a need to finish raw edges as there would be with a regular woven fabric.
- Place one of the 6-3/4” x 19” pieces of fabric A RSU and align the zipper tape with the 19” raw edge, matching the marked centers of the zipper and the pillow back. The zipper and the fabric should be RST (see figure 2). Use binding clips to secure the zipper in place.
- Remove the standard needle plate from the MC9400 and install the Ultra Glide Needle Plate. Using this needle plate with the Ultra Glide Foot will keep the oilcloth gliding smoothly under the presser foot. Select a zipper sewing stitch to move the needle position to the left. Lengthen the stitch length to 3.0. Attach zipper foot E to the presser foot and sew the zipper to the fabric A with a 1/4″ seam allowance (see figure 3). Finger press the seam allowance of the zipper away from the zipper teeth, under the oilcloth. Fold the remaining edge of the zipper over (see figure 4).
- Place the remaining 6-3/4” x 19” piece of fabric A RSU. Take the remaining side of the zipper tape and match the marks on the zipper tape edge and the pillow back edge, with the zipper right side down. Line up the raw edges and clip in place with binding clips (see figure 5). Sew the zipper in place with a 1/4” seam allowance (see figure 6).
- Once again, finger press the zipper tape seam allowance away from the zipper teeth so it is under the oilcloth pieces (see figure 7).
- Remove the zipper foot E from the presser foot and attach the Janome Ultra Glide Foot to the presser foot (see figure 8).
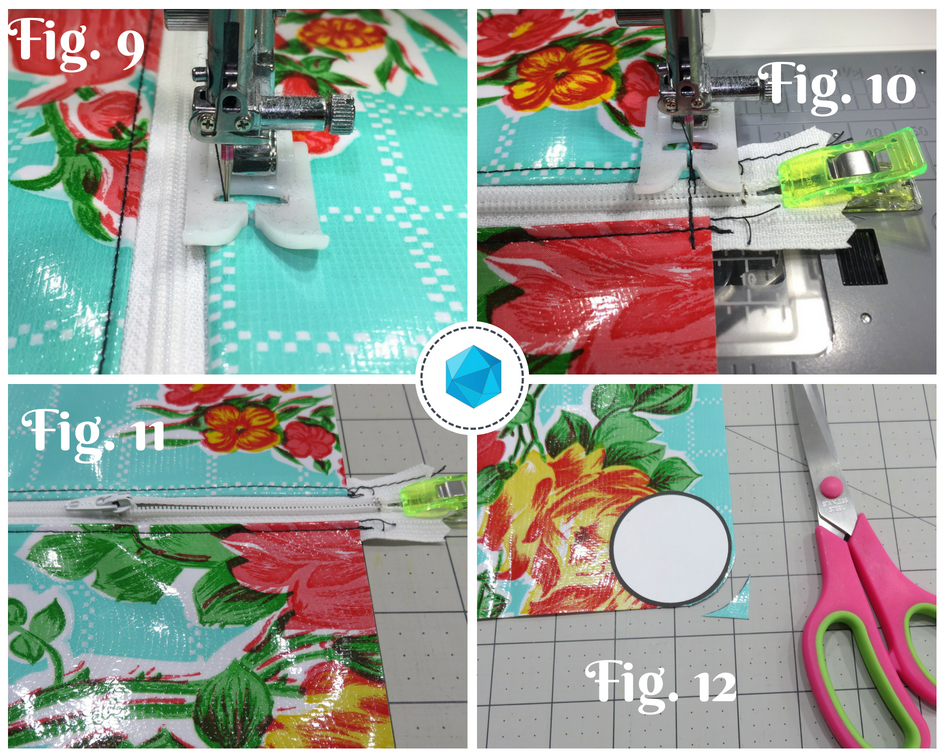
Figures 5-8 Topstitch 1/8” away from the folded edge of the oilcloth (see figure 9).
- Select stitch #1 from the utility menu. Move the zipper head towards the middle of the zipper tape (see figure 11). Use a binding clip to keep the ends of the zipper together. Sew a few stitches and then backstitch to connect the zipper ends, about 1/8” away from the edge of the oilcloth fabric (see figure 10). This will act as a zipper stop until the front and back of the pillow are sewn together. Keep the zipper unzipped at least half way.
Round the corners and baste the pom pom trim
- Take the circle template that you printed and cut out, and place it with the edges touching the corner edges of the pillow. Trace around the curved edge of the circle with a marking pen.
- Cut the edge to round the corner (see figure 12).
Figures 9-12 - Repeat steps 8 and 9 with the remaining corners of the back of the pillow and the four corners of the front of the pillow.
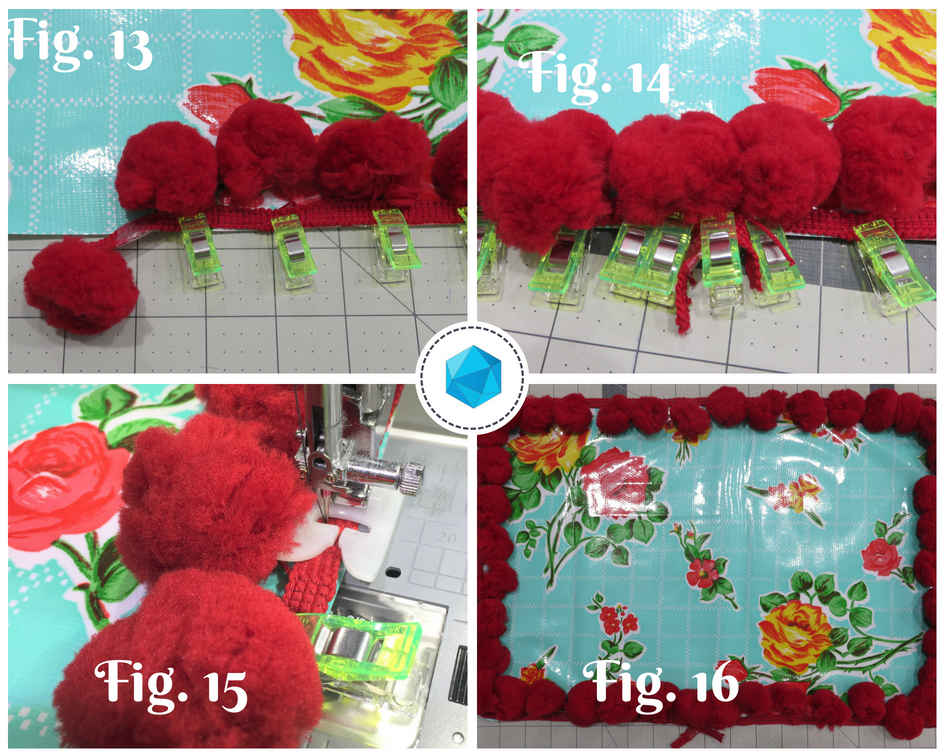
- Set aside the zippered back of the pillow. Take the 13” x 19” piece for the pillow front and the jumbo pom pom trim. Place the pillow front RSU. Starting in the middle of one of the 19” edges of the pillow front, align the edge of the trim with the edge of the oilcloth. Trail the end of the trim off the edge of the pillow by 2-3 inches figure (see figure 13). The pom poms should be pointing inward towards the center of the pillow front.
- Align the edge of the trim and the edge of the pillow front all the way around the perimeter of the pillow. When you reach the point you started the trim at, overlap the trim and trail the end off by 2-3 inches, as you did to start (see figure 14). If the jumbo poms overlap, carefully trim one or two away to decrease the bulk. Use binding clips to clip the trim in place.
- Move the needle position to the left. Lengthen the stitch length to 5.0 for a basting stitch. Baste the trim in place with a 1/8”-1/4” seam allowance (see figure 15).
Sew the pillow together and finish
- Place the basted pillow front RSU (see figure 16).
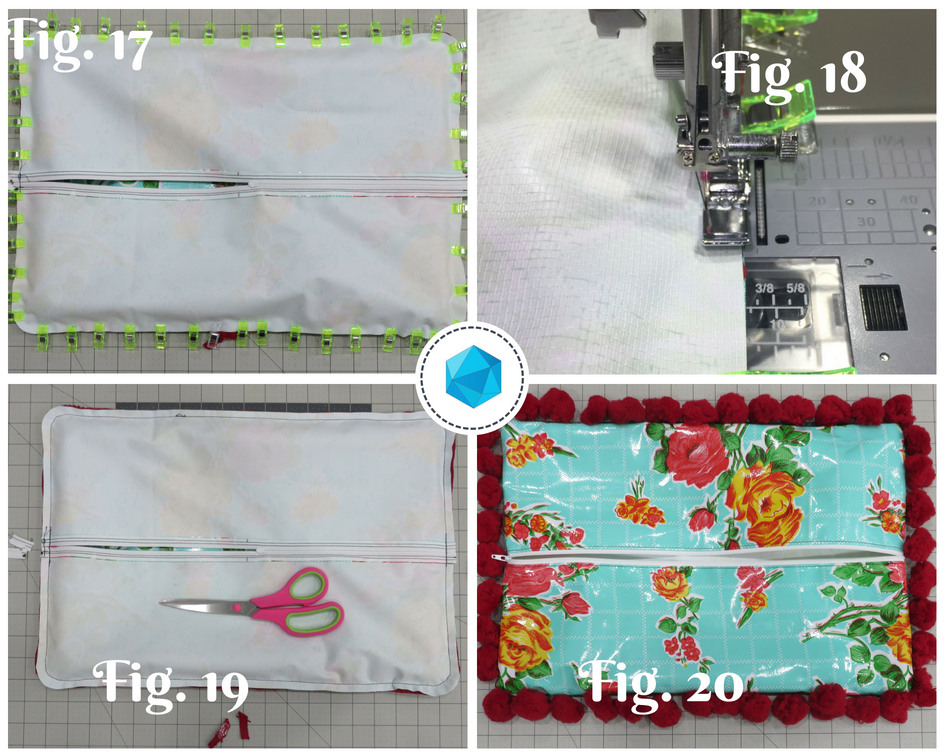
Figures 13-16 - Place the zippered back of the pillow right side down on top of the pillow front (see figure 17). Line up all the edges and make sure the pom poms are all facing in towards the center of the pillow. Double check to be sure the zipper is unzipped at least half way. Use binding clips to secure all the edges together.
- Remove the Ultra Glide Foot and attach the zipper foot E to the presser foot. Keep the needle position moved to the left, as if you were sewing a zipper. Sew around the perimeter of the pillow using a 1/4” seam allowance (see figure 18). Double check that none of the pom poms are getting caught in the seam allowance while you are sewing.
- Use a pair of scissors to trim away the excess ends of the zipper so the ends are flush with the pillow edges (see figure 19).
- Turn the pillow right side out and carefully push out all the curved edges (see figure 20).
Figures 17-20
Tip: Oilcloth has little to no stretch, unlike cotton fabrics you might be used to working with. A zipper closure helps to keep seams sewn together versus using an envelope closure. Be careful to not stretch the fabric when inserting the pillow form. For a fully weather-resistant pillow, you can opt to sew this pillow without the ball fringe trim.
- Insert the 12” x 18” pillow form and use to liven up your patio!
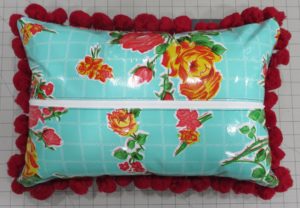
Finished Pillow! Now get out there and party with your new DIY outdoor pillow 😉